How to Grow Garlic – Complete Guide. Grow & Care
Are you looking to Grow Garlic? You Can Grow It!
Garlic, a staple in kitchens worldwide, not only enhances flavors but also boasts numerous health benefits, making it a popular choice for gardeners and chefs alike.
Whether you are a seasoned gardener or a beginner looking to grow your own garlic, understanding the different types of garlic, along with their planting, care, and harvesting techniques, is essential.
This guide will provide detailed insights into everything from the basics of what garlic is, to the specifics of various garlic varieties like softneck and hardneck, and the best practices for planting, growing, and caring for your garlic.
Discover how to maximize your garlic yield with companion planting and protect your crop from common pests and diseases. Let’s delve into the aromatic world of growing garlic, ensuring your culinary adventures are always seasoned to perfection.
Chapters
- What is Garlic?
- Garlic Softneck Varieties
- Garlic Hardneck Varieties
- How to Plant Garlic
- Growing Garlic at Home
- How to Care for Garlic
- How to Harvest Garlic
- How to Prepare and Use Garlic
- How to Store Garlic
- Garlic Pests and Diseases
- Garlic Companion Planting
- Great Garlic Varieties to Grow
- FAQ
- Learn everything you need to know about Organic Gardening from Pros
- Lineup of Top Organic Gardening Audio Books
What is Garlic?
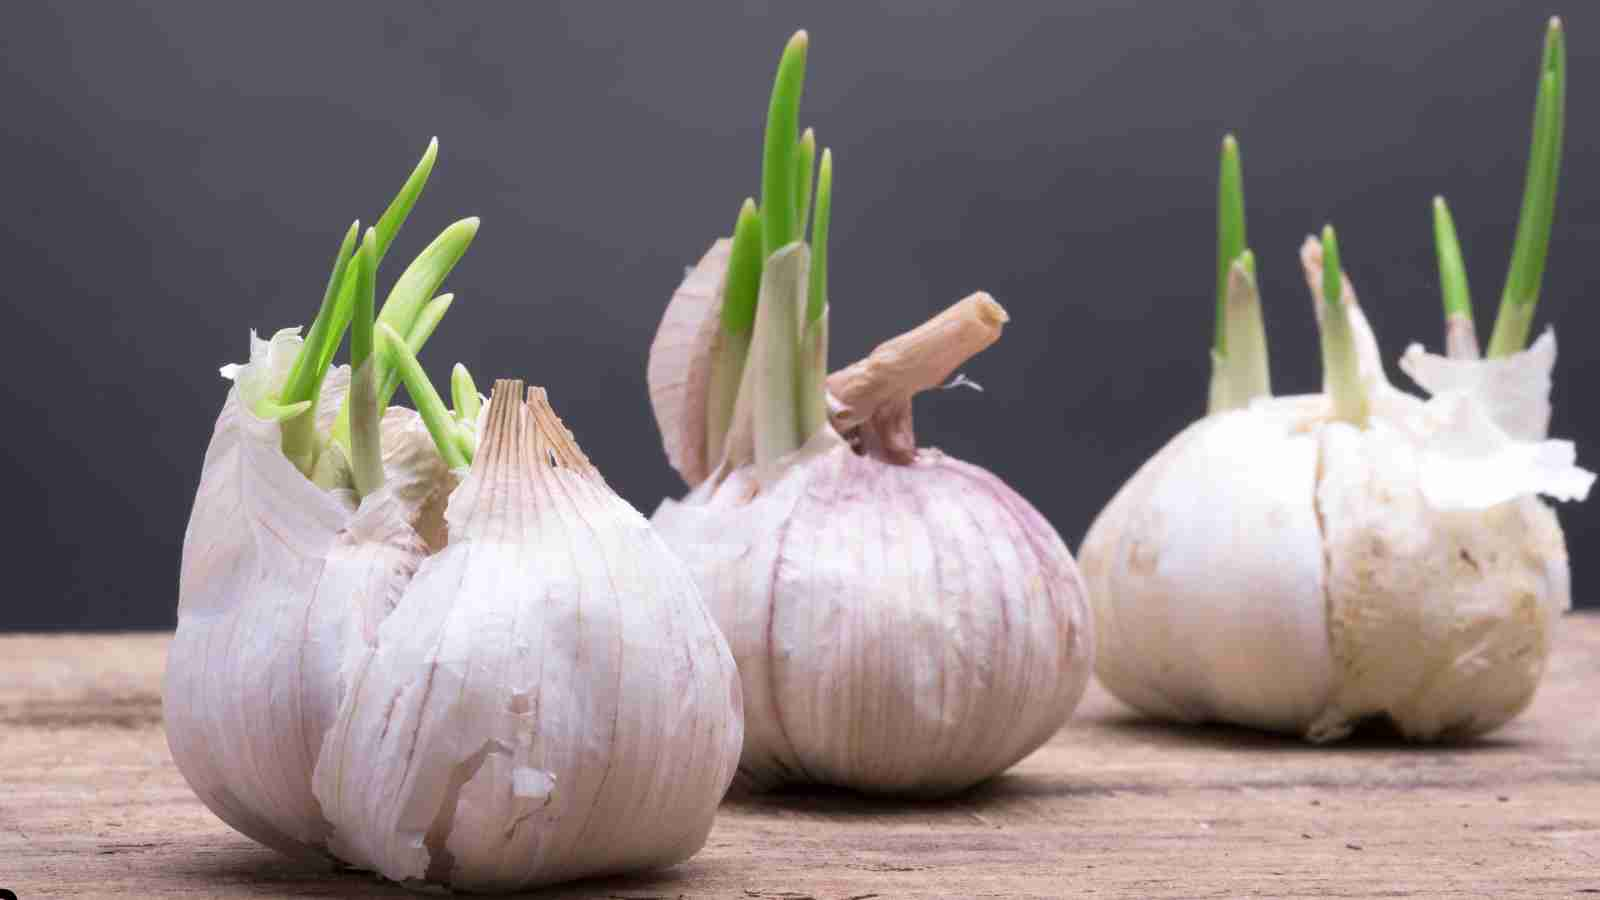
Garlic (Allium sativum) is a bulbous plant closely related to onions, shallots, and leeks. It is native to Central Asia and northeastern Iran and has been used for both culinary and medicinal purposes for thousands of years. Each garlic bulb consists of numerous cloves, each enclosed in a paper-like skin.
Garlic Softneck Varieties
Softneck garlic, known for its flexible stalk, is the type most commonly found in supermarkets. It generally produces more cloves per bulb than hardneck varieties. Popular softneck varieties include ‘Silverskin’ and ‘Artichoke’, known for their mild flavor and excellent storage properties.
Garlic Hardneck Varieties
Hardneck garlic features a rigid central stalk and produces fewer but larger cloves than softneck types. They are more flavorful and have a variety of tastes and heat levels. Notable hardneck varieties include ‘Rocambole’, ‘Porcelain’, and ‘Purple Stripe’, each offering distinct flavors and slightly different growing needs.
How to Plant Garlic
Garlic is best planted in the fall, about 4-6 weeks before the ground freezes. Plant cloves pointy-end up, about two inches deep and 4-6 inches apart in well-drained soil. Ensure your garden bed receives plenty of sunlight.
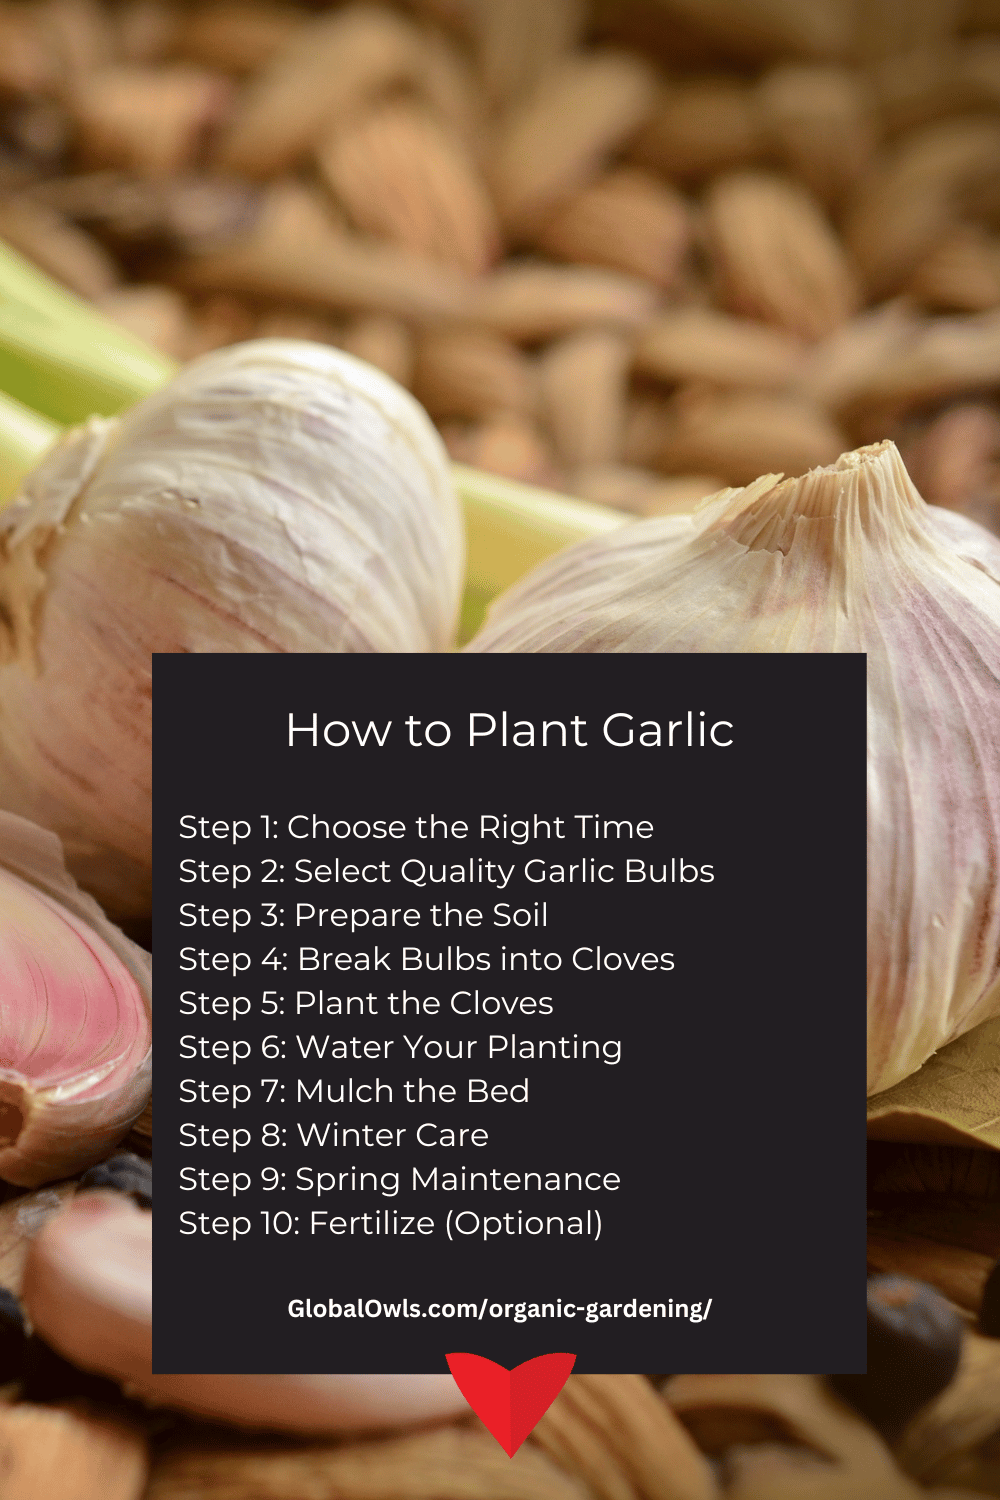
Step 1: Choose the Right Time
Garlic is typically planted in the fall, about 4-6 weeks before the first hard frost. This timing allows the garlic to establish roots before the ground freezes but prevents significant top growth, which can be damaged by winter weather. In milder climates, planting can also be done in early spring as soon as the soil is workable.
Step 2: Select Quality Garlic Bulbs
Choose high-quality, disease-free garlic bulbs from a reputable nursery or garden center. Avoid using garlic from grocery stores as it may have been treated to inhibit sprouting. Consider the variety that best suits your climate and taste preferences, whether it’s a robust hardneck or a milder softneck.
Step 3: Prepare the Soil
Garlic prefers well-drained, fertile soil with a pH of 6.0 to 7.5. Prepare your garden bed by loosening the soil to a depth of about 12 inches and mixing in plenty of organic matter such as compost or well-rotted manure. This will improve soil structure, fertility, and drainage.
Step 4: Break Bulbs into Cloves
Carefully break the garlic bulb into individual cloves shortly before planting. Each clove will grow into a new garlic bulb. Leave the papery husk on each clove as it helps protect the clove and promotes healthy growth.
Step 5: Plant the Cloves
Plant garlic cloves pointed-end up, as the sprout will emerge from the pointed tip. Plant the cloves about 2 inches deep and space them 4-6 inches apart in rows that are 12-18 inches apart. This spacing allows for adequate air circulation and room for the bulbs to develop.
Step 6: Water Your Planting
After planting, water the bed well to settle the soil around the cloves. This initial watering helps initiate root development but be careful not to overwater, as garlic does not grow well in excessively wet soil.
Step 7: Mulch the Bed
Apply a layer of organic mulch, such as straw or leaves, about 2-4 inches thick. Mulch helps maintain soil moisture, suppresses weeds, and provides insulation against severe cold in winter climates.
Step 8: Winter Care
In colder regions, ensure the garlic bed is well-insulated with mulch to protect it from freezing temperatures. Garlic requires little maintenance over the winter, but it’s important to ensure that the bed does not become waterlogged.
Step 9: Spring Maintenance
As the weather warms in spring, begin to reduce the layer of mulch to allow the soil to warm. Keep an eye on moisture levels, particularly as the weather turns drier; garlic needs an inch of water per week, whether from rainfall or irrigation.
Step 10: Fertilize (Optional)
In early spring, consider applying a nitrogen-rich fertilizer to encourage good leaf growth, which is essential for bulb development. However, cease fertilizing by May as you want to encourage the plant to start focusing energy on bulb growth rather than leaf production.
By following these steps, you’ll give your garlic the best start possible, leading to a successful harvest of flavorful bulbs that can enhance your cooking and provide health benefits.
If you’re too late with planting your garlic, you can try soaking it in water until they root and plant them outside later. Check out the video below on how we did it.
Growing Garlic at Home
Garlic needs cool temperatures during the initial growth phase and requires minimal space, making it excellent for home gardens. It prefers loose, fertile soil with plenty of organic matter. Regular weeding and mulching help retain moisture and suppress weeds.
Growing garlic at home is a rewarding experience and relatively simple if you follow these clear steps. Here’s how to nurture your garlic from planting to mature bulbs ready for harvest:
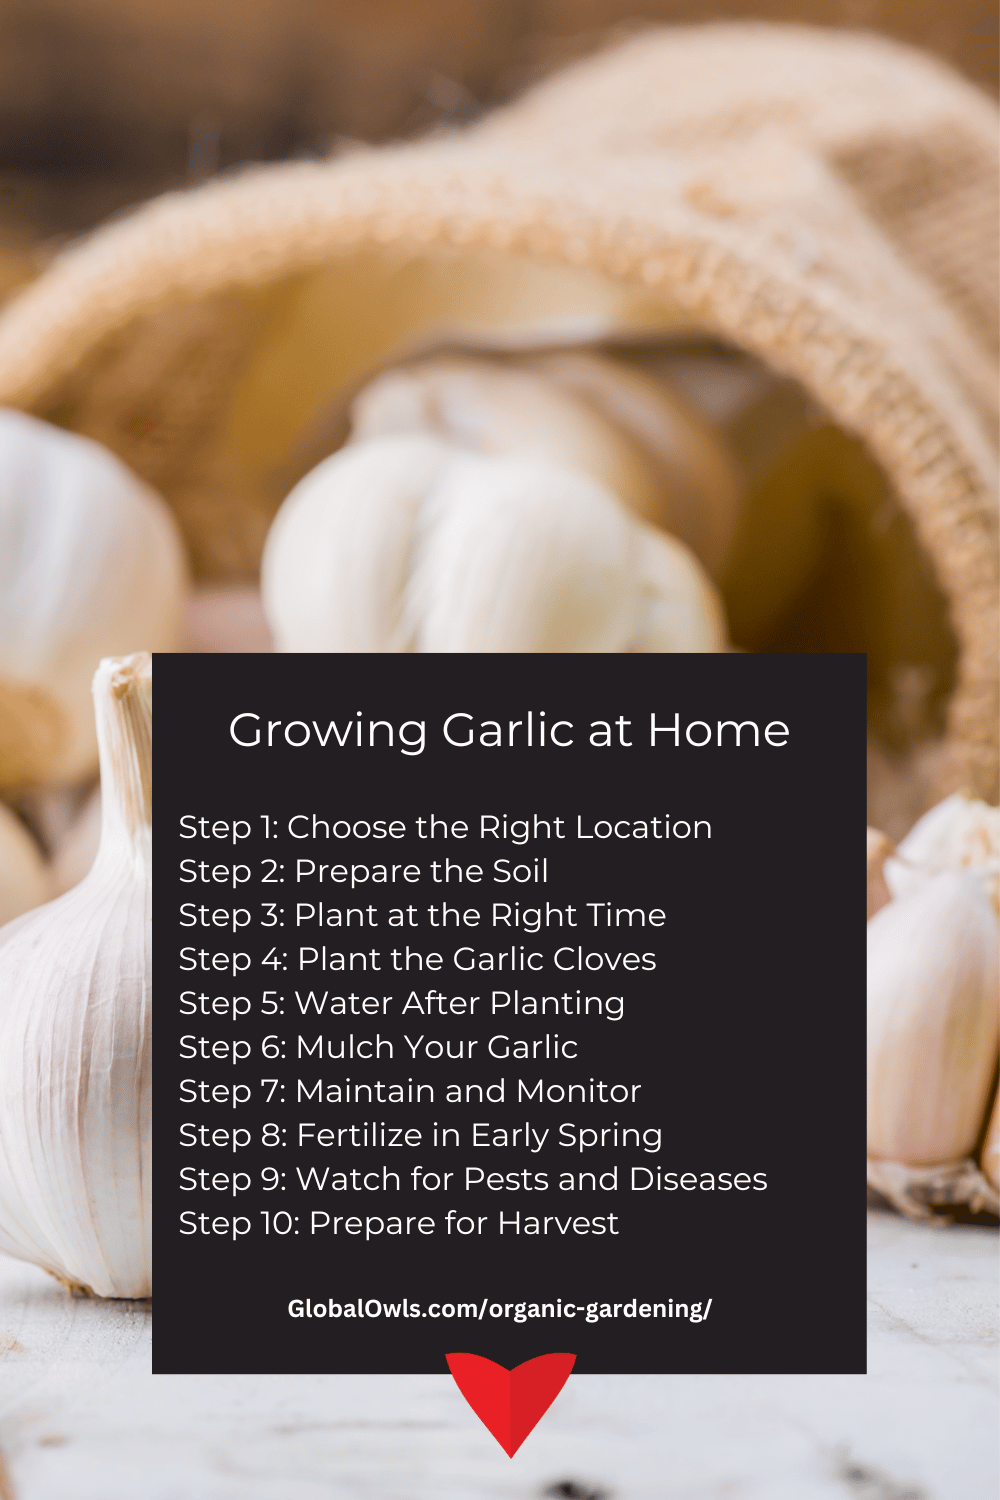
Step 1: Choose the Right Location
Select a spot in your garden that receives full sunlight for at least 6 hours a day. Garlic thrives in areas with good air circulation and full exposure to sunlight.
Step 2: Prepare the Soil
Garlic grows best in loose, fertile soil. Loosen the soil to a depth of about 12 inches and mix in a generous amount of organic compost or aged manure to improve fertility and drainage. Ensure the soil has a pH between 6.0 and 7.5 for optimal growth.
Step 3: Plant at the Right Time
In most climates, garlic is planted in the fall, about 4-6 weeks before the ground freezes. This timing allows the garlic to establish roots without producing too much top growth before winter.
Step 4: Plant the Garlic Cloves
Separate the garlic bulbs into individual cloves just before planting. Plant the cloves pointed end up, 2 inches deep and 4-6 inches apart, in rows spaced 12-18 inches apart.
Step 5: Water After Planting
Water the soil gently but thoroughly after planting to settle the soil around the cloves and initiate root growth. Avoid overwatering, as garlic does not grow well in waterlogged soil.
Step 6: Mulch Your Garlic
Apply a 2-4 inch layer of organic mulch, such as straw or shredded leaves, over the planting area. Mulch helps maintain soil moisture, regulates soil temperature, and suppresses weed growth.
Step 7: Maintain and Monitor
Keep an eye on your garlic throughout the growing season. Remove weeds as they appear to prevent them from competing with the garlic for nutrients. Water the plants when the soil feels dry to the touch but be cautious of overwatering, especially as the bulbs begin to form.
Step 8: Fertilize in Early Spring
Apply a balanced, slow-release fertilizer early in the spring as the garlic resumes active growth. This will provide a boost of nutrients to support leaf and bulb development. Stop fertilizing once the garlic begins to form bulbs around May.
Step 9: Watch for Pests and Diseases
Regularly inspect your garlic for signs of pests or disease. Common issues include fungal diseases, which can be minimized by ensuring proper spacing and air circulation around your plants.
Step 10: Prepare for Harvest
As summer approaches, start monitoring your garlic for signs of maturity, such as the yellowing and dying back of lower leaves. Reduce watering to allow the bulbs to firm up before harvest.
By following these steps, you will be well on your way to successfully growing robust, flavorful garlic in your home garden.
How to Care for Garlic
Water garlic plants deeply but infrequently, as the bulbs develop best in slightly dry conditions. Avoid overwatering to prevent rot. Fertilize with a high-nitrogen source at planting and switch to a phosphorus-rich fertilizer just before bulb development.
Proper care is essential for cultivating healthy garlic plants. Start by watering your garlic deeply but infrequently; the soil should be moist but not waterlogged. This watering pattern encourages the roots to grow deeper, searching for moisture, and helps prevent fungal diseases that thrive in wet conditions. Initially, apply a high-nitrogen fertilizer to promote strong leaf and root growth. As the growing season progresses and the bulbs begin to form, switch to a phosphorus-rich fertilizer to support robust bulb development. Regularly check for and remove weeds, which compete with garlic for nutrients. Be vigilant about pests and diseases, and apply organic preventive measures if necessary, such as using neem oil for pests or improving soil drainage to fight off fungal infections.
How to Harvest Garlic
Garlic is ready to harvest when the lower leaves start to brown and die back, typically in mid to late summer. Use a fork to gently lift the bulbs to avoid damaging them. Shake off any excess soil and let them dry.
Garlic bulbs are typically ready for harvest in mid to late summer, signalled when several of the lower leaves turn brown while the upper leaves remain green. Harvesting at the right time is crucial for ensuring the bulbs are mature and suitable for long-term storage. Gently loosen the soil around each plant with a fork, taking care not to puncture the bulbs. Lift the garlic bulbs out of the soil, brush off any loose dirt, and be careful not to remove the papery husk around the bulbs as it protects them during storage. Allow the garlic to dry in a cool, shaded area with good air circulation for a few days to toughen the outer layers, which facilitates storage.
How to Prepare and Use Garlic
Garlic can be used raw or cooked in a multitude of dishes to add flavor. To prepare, separate the cloves and peel off the skin. Garlic can be minced, sliced, or used whole, depending on the recipe.
Garlic is a versatile ingredient that adds depth and flavor to dishes, whether used raw or cooked. To prepare garlic for cooking, separate the desired number of cloves from the bulb and peel off the outer layers. You can mince, slice, or leave the cloves whole according to your recipe’s requirements. Raw garlic offers a sharp, pungent flavor, ideal for dressings and sauces. Cooking garlic mellows its intensity and brings out a sweeter, more nuanced flavor, making it suitable for a wide range of culinary applications from sautés to roasts.
How to Store Garlic
Cure garlic bulbs in a dry, shaded area with good air circulation for a few weeks after harvesting. Once dried, trim the roots and stalks and store in a cool, dry place. Properly stored garlic can last for several months.
After harvesting and drying your garlic, it’s important to cure it properly to extend its shelf life. Hang the garlic in bunches or spread it out in a single layer in a dry, well-ventilated area away from direct sunlight. This curing process should last for a few weeks until the roots have dried and the outer skin is papery. Once cured, trim off any dirt-clad roots and the hardneck stalks if you’ve grown hardneck varieties. Store the cured garlic in a mesh bag or loosely woven basket in a cool, dry place such as a pantry or cellar. Properly cured garlic can last up to several months, depending on the variety and storage conditions. To maintain freshness, avoid storing garlic in plastic bags or containers, which can retain moisture and promote spoilage.
Garlic Pests and Diseases
Common pests include onion maggots and thrips, while diseases like white rot and botrytis can affect plants. Good crop rotation and proper sanitation of planting material can help prevent most problems.
Garlic is susceptible to several pests and diseases that can significantly affect its growth and yield. Onion maggots and thrips are common pests; onion maggots burrow into the soil and feed on the roots and bulbs, while thrips feed on the foliage, potentially transmitting viral diseases. White rot and botrytis (gray mold) are among the most destructive fungal diseases. White rot affects the roots, eventually decaying the entire plant, while botrytis affects the leaves and bulbs, especially under wet conditions.
To manage these issues, practice good crop rotation, avoiding planting garlic or other alliums in the same soil for several years. Use clean, disease-free planting stock and consider solarizing the soil to eliminate fungi and pests. Proper spacing and weed management also improve air circulation, which helps keep the foliage dry and less prone to fungal diseases. In some cases, applying fungicides or insecticides may be necessary, although organic options like neem oil can also be effective for mild pest control.
Garlic Companion Planting
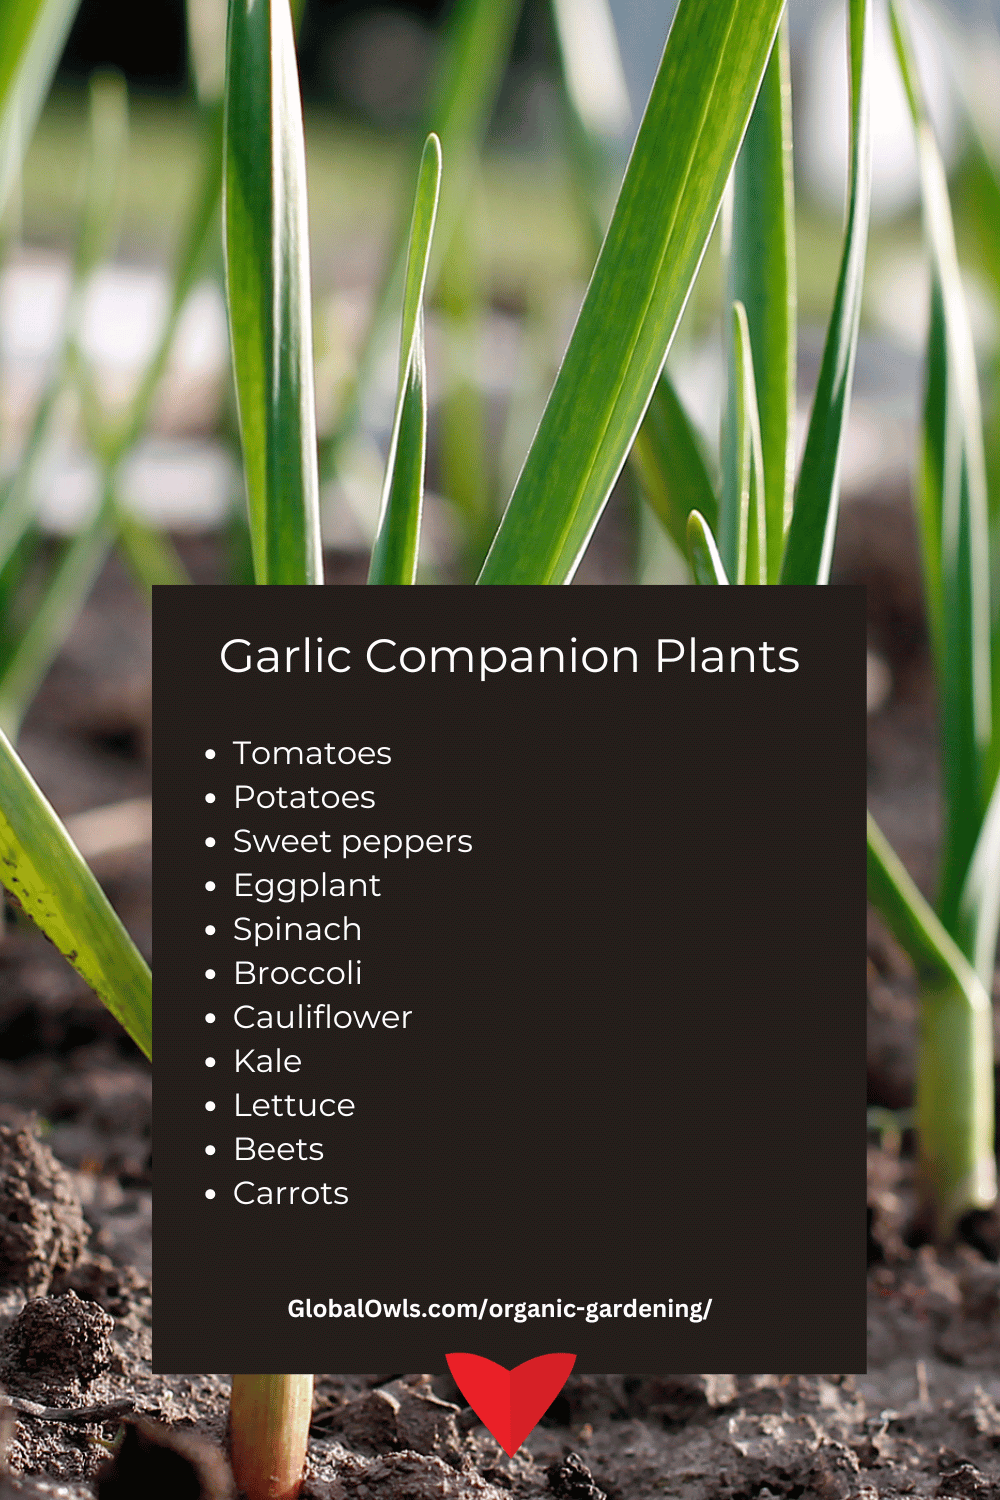
Garlic benefits from being planted near plants that can repel pests or enhance growth. Good companions include tomatoes, peppers, and eggplants. Avoid planting garlic near peas and beans, as they can inhibit each other’s growth.
Companion planting can enhance garlic’s growth and protect it from pests. Garlic acts as a natural pest deterrent, making it an excellent companion for many garden vegetables. Tomatoes, peppers, and eggplants benefit from garlic’s ability to repel or distract pests such as spider mites and aphids. Planting garlic near these vegetables can improve their health and vitality.
However, garlic should be kept away from peas and beans. It releases substances that may inhibit the growth of legumes. Similarly, planting garlic near parsley and sage should be avoided as they can compete for similar nutrients. On the other hand, planting garlic near carrots can help repel carrot flies, demonstrating garlic’s protective qualities in a vegetable garden.
Check out a list of good garlic companion plants below
Great Garlic Varieties to Grow
For beginners, varieties like ‘California Early’ and ‘Italian Purple’ are robust and easier to grow. For more adventurous gardeners, ‘German Red’ and ‘Spanish Roja’ provide more complex flavors and are well-suited to diverse climates.
Choosing the right garlic variety can make a significant difference in both ease of cultivation and culinary output. For beginners, ‘California Early’ is a softneck variety that is very hardy and adapts well to different climates, producing a mild flavor that’s versatile in cooking. ‘Italian Purple’, another softneck, offers a slightly stronger flavor and is also robust, making it suitable for varied growing conditions.
For more experienced gardeners or those looking for more flavorful options, ‘German Red’, a hardneck variety, offers a strong, spicy flavor that stands out in dishes. Another excellent choice is ‘Spanish Roja’, known for its rich, robust flavor and large, easy-to-peel cloves, ideal for gourmet cooking. These varieties tend to be more sensitive to growing conditions but reward the gardener with distinctive flavors and higher culinary quality.
Conclusion
Growing garlic can be a rewarding endeavor for any gardener. By following the comprehensive guidelines outlined in this guide, from selecting the right garlic variety to understanding the nuances of care and harvesting, you can ensure a successful garlic crop. Remember, the key to lush, flavorful garlic lies in proper planting, diligent care, and timely harvesting.
Whether it’s the robust flavors of hardneck varieties or the mild and long-lasting softneck types, the right garlic can elevate your culinary dishes and enhance your gardening experience. With these tips and techniques, you’re well-equipped to grow, harvest, and enjoy your own garlic, adding both flavor and nutritional benefits to your meals.
Happy gardening and cooking with your home-grown garlic.
You Can Grow It!
FAQ
What are the basic requirements for growing garlic?
Garlic thrives in well-drained, fertile soil with plenty of sunlight. It prefers a pH between 6.0 and 7.0. Before planting, enrich the soil with organic matter such as compost or well-rotted manure.
How do you plant garlic?
Plant garlic cloves in the fall, about six weeks before the ground freezes. Place cloves 2 inches deep and 4-6 inches apart, with the pointed end facing up. Cover with soil and add a layer of mulch for winter protection.
Can garlic be grown in containers?
Yes, garlic can be successfully grown in containers. Choose a deep pot at least 8-10 inches deep and wide enough to allow for 4-6 inches of space between cloves. Use high-quality potting soil and ensure good drainage.
What are the best garlic varieties to grow?
Popular varieties include ‘Softneck’ garlic, which is easier to grow and stores well, and ‘Hardneck’ garlic, which offers more complex flavors and produces edible scapes. The choice depends on your climate and culinary preferences.
How do you harvest garlic?
Harvest garlic when several lower leaves turn brown but five or six top leaves are still green. Carefully dig up the bulbs, being careful not to damage them. Brush off the soil and let them dry in a shady, ventilated area.
How often should garlic be watered?
Water garlic plants deeply once a week if there is no rain, ensuring that the soil is moist but not waterlogged. Reduce watering as the bulbs mature and the leaves begin to yellow.
Does garlic require fertilization?
Apply a balanced fertilizer at planting and an additional high-nitrogen fertilizer in the early spring. Avoid fertilizing once the bulbs begin to form, as this can affect the quality of the garlic.
How do you prevent garlic from rotting or becoming diseased?
Prevent garlic from rotting by ensuring good soil drainage and crop rotation. Avoid overhead watering to minimize moisture on the foliage, which can lead to fungal diseases.
What pests commonly affect garlic crops?
Common pests include onion thrips and the allium leaf miner. Prevent infestations by using floating row covers and practicing good garden hygiene, such as removing plant debris and controlling weeds.
Can garlic be used as a companion plant in the garden?
Yes, garlic acts as a natural pest repellent and can be planted near roses, tomatoes, and raspberries to deter pests such as aphids and beetles. However, avoid planting garlic near beans and peas, as it can inhibit their growth.
When is the best time to plant garlic in milder climates?
In milder climates, garlic can be planted in late winter or early spring when the soil is workable. This allows for a longer growing season and harvesting in late spring or early summer.
How deep should garlic cloves be planted?
Garlic cloves should be planted about 2 inches deep in most soils. In heavier clay soils, planting them slightly shallower can help prevent rot, while in sandy soils, a slightly deeper planting may be necessary to ensure adequate moisture retention.
Can garlic be grown from store-bought bulbs?
Yes, garlic can be grown from store-bought bulbs, but it’s best to use organic garlic because non-organic garlic may be treated with growth inhibitors. For best results, use bulbs specifically intended for planting, which can be found at nurseries or seed suppliers.
What should I do if my garlic plants begin to flower?
If your garlic plants begin to produce flowers, or scapes, on hardneck varieties, it’s beneficial to cut them off. This allows the plant to direct energy back into bulb growth rather than flower production. Scapes are edible and can be used in cooking.
How can I tell if my garlic is ready to harvest?
Garlic is ready to harvest when the lower leaves start to brown and die back, but several green leaves remain. This typically happens in mid to late summer. The exact timing can vary based on your climate and the variety planted.
What are the steps for curing garlic after harvesting?
After harvesting, cure garlic by hanging the bulbs in a dry, well-ventilated area out of direct sunlight for a few weeks. Once the outer skin is papery and the roots have dried, trim the roots and cut the stalks to about an inch above the bulb if desired.
How should harvested garlic be stored?
Store cured garlic in a cool, dry place with good air circulation. Mesh bags, paper bags, or even braided and hung are suitable methods. Avoid storing garlic in plastic bags or containers, which can retain moisture and cause rot.
What are the common mistakes to avoid when growing garlic?
Common mistakes include planting cloves too shallow, watering too much (leading to rot), neglecting to remove the mulch in spring which can delay growth, and not rotating crops, which can increase disease risks.
How long can garlic be stored after harvesting?
Properly cured and stored garlic can typically last for 6-8 months. The longevity depends on the variety and storage conditions. Softneck garlic generally stores longer than hardneck garlic.
Can garlic be regrown from its own seeds?
While garlic does produce bulbils in its flower heads, it’s more commonly and reliably propagated through cloves rather than seeds. Planting cloves results in a clone of the original, ensuring the same quality and characteristics.
How much spacing is required between garlic plants?
Garlic cloves should be spaced about 4-6 inches apart in rows. Rows should be spaced about 12-18 inches apart. This spacing allows adequate room for the bulbs to develop without competing for nutrients and sunlight.
What is the ideal temperature for growing garlic?
Garlic grows best in temperatures ranging from 32°F to 50°F (0°C to 10°C) during its initial growth phase after planting. As the weather warms up in the spring, garlic will enter a second growth phase, culminating in bulb formation.
Can garlic be grown alongside other herbs or vegetables?
Garlic pairs well in the garden with most herbs and vegetables, except for beans and peas, as it may inhibit their growth. It works well with tomatoes, peppers, eggplants, and root vegetables like carrots and beets.
What type of mulch is best for garlic?
Straw or hay is ideal for mulching garlic because it helps maintain soil moisture while keeping weeds at bay. Additionally, organic mulches like these help add nutrients back into the soil as they decompose.
How do I deal with garlic that has split into multiple cloves while growing?
Splitting can occur when cloves are planted too shallowly or experience fluctuating temperatures. While the garlic is still edible, its storage life may be reduced. To minimize splitting, plant cloves at the recommended depth and mulch well.
Is garlic sensitive to any particular soil conditions?
Garlic is particularly sensitive to overly wet or waterlogged soil, which can lead to bulb rot. Ensure your planting site has good drainage and consider amending heavy clay soils with compost or sand to improve soil structure.
How can I enhance the flavor of my home-grown garlic?
The flavor of garlic can be influenced by the soil conditions and climate where it’s grown. To enhance flavor, ensure your garlic has sufficient nutrients (use a balanced organic fertilizer) and harvest at peak maturity.
What are the signs of overwatering in garlic plants?
Signs of overwatering include yellowing leaves, stunted growth, and soft, mushy bulbs. If you suspect overwatering, reduce your watering schedule and improve soil drainage.
Can I grow garlic from a single clove?
Yes, a single garlic clove is all you need to grow an entire garlic bulb. Each clove planted will develop into a new bulb by the end of the growing season.
What are the best organic pest control methods for garlic?
To control pests organically in garlic crops, use barriers such as row covers to prevent insect access, introduce beneficial insects like ladybugs to control aphids, and apply neem oil or insecticidal soap sparingly to manage severe infestations.
Learn everything you need to know about Organic Gardening from Pros
Start your Free Audible Trial and get access to the Top Gardening Audio Books for an entire month. Check it out!
